
Screen recording is a powerful tool available on iPhones that allows users to record their screen activity. Whether you’re creating a tutorial, capturing gameplay, or saving a moment from a live stream, screen recording on an iPhone is straightforward. This guide will walk you through every step, providing detailed instructions to ensure you can make the most of this feature.
What Is Screen Recording on iPhone?
Screen recording is a built-in feature that captures everything displayed on your iPhone’s screen in real-time. Introduced with iOS 11, it has since become one of the most versatile tools, enabling users to:
- Record app demonstrations.
- Create how-to guides and tutorials.
- Save fleeting moments from social media stories.
- Capture gameplay highlights.
With screen recording, you can also include sound, making it ideal for narrated videos or capturing in-app audio.
Setting Up Screen Recording on Your iPhone
Before using screen recording, you must enable it in your iPhone’s Control Center. This setup process is quick and requires just a few steps.
Step 1: Enable Screen Recording
- Open the Settings app on your iPhone.
- Scroll down and tap Control Center.
- Select Customize Controls (or Control Center depending on your iOS version).
- Under the “More Controls” section, locate Screen Recording.
- Tap the green + icon to add it to the Control Center.
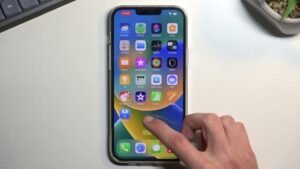
Step 2: Access the Control Center
After enabling screen recording, swipe down from the top-right corner (for iPhones with Face ID) or swipe up from the bottom of the screen (for iPhones with a Home button) to access the Control Center.
How to Screen Record on iPhone
Recording your iPhone screen is a seamless process once the feature is set up. Here’s how to get started:
Step 1: Open the Control Center
Swipe to access the Control Center.
Step 2: Start the Recording
- Tap the Screen Recording icon (a circle within a circle).
- A three-second countdown will appear, giving you time to prepare.
- The icon turns red, indicating that recording has started.
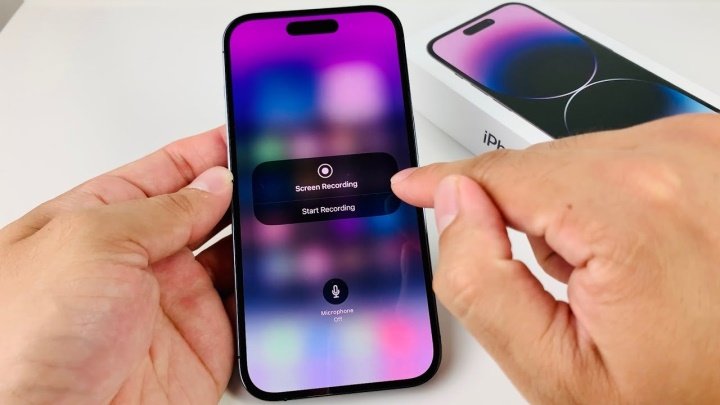
Step 3: Record Audio (Optional)
If you want to include audio in your screen recording:
- Press and hold the Screen Recording icon in the Control Center.
- Tap the Microphone icon to enable audio recording.
- Select Start Recording to begin capturing both screen activity and sound.
How to Stop Screen Recording
Stopping a screen recording is just as simple:
- Tap the red status bar or the red icon in the top-left corner of your screen.
- Confirm by selecting Stop in the pop-up. Alternatively, open the Control Center and tap the Screen Recording icon again to stop recording.
Once you stop the recording, it will be automatically saved to your Photos app.
Accessing and Editing Your Screen Recordings
All screen recordings are saved in the Photos app. You can access them by navigating to the Recents album. From here, you can view, share, or edit the recording.
Editing Your Screen Recording
The Photos app offers built-in tools to make quick edits:
- Open your recording in the Photos app.
- Tap Edit in the upper-right corner.
- Adjust the start and end points using the trimming tool.
- Save your changes by tapping Done.
For more advanced editing, third-party apps like iMovie, Adobe Premiere Rush, or CapCut provide additional features such as transitions, annotations, and special effects.
Tips for a Professional-Looking Screen Recording
1. Prepare Your Screen
Ensure your screen is clutter-free and only displays the relevant content. Close unnecessary apps and clear notifications.
2. Enable Do Not Disturb
Activate Do Not Disturb mode to prevent interruptions from calls and notifications during your recording.
3. Record in Landscape Mode
For gameplay or video tutorials, using landscape mode provides a more immersive viewing experience.
4. Check Audio Levels
If you’re recording audio, make sure the microphone is enabled and the background noise is minimized.
Common Problems and How to Solve Them
1. Screen Recording Option Missing
- Make sure your iPhone is updated to iOS 11 or later.
- Confirm that Screen Recording is added to the Control Center.
2. No Sound in Recording
- Check that the microphone is enabled before starting the recording.
- Note that some apps may block audio capture due to copyright restrictions.
3. Recording Stops Unexpectedly
- Ensure you have enough storage space for the recording.
- Restart your iPhone to resolve potential software glitches.
Creative Uses for Screen Recording
Screen recording is more than just a functional tool—it’s a creative resource. Here are some ways you can use it:
1. Create Tutorials
Demonstrate step-by-step instructions for apps, settings, or troubleshooting tasks.
2. Capture Gameplay
Showcase your gaming achievements or create content for platforms like YouTube and Twitch.
3. Save Social Media Content
Preserve fleeting moments like Instagram Stories or Snapchat videos that disappear after 24 hours.
4. Troubleshoot Issues
Record and share technical issues with customer support for easier troubleshooting.
Legal and Ethical Considerations
When using screen recording, always be mindful of the following:
- Obtain Permission: Recording others without their consent may violate privacy laws.
- Respect Copyright: Avoid sharing recordings of protected content without proper authorization.
By adhering to these principles, you can use screen recording responsibly and avoid potential legal complications.
Using Third-Party Screen Recording Apps
While Apple’s built-in screen recorder is highly capable, third-party apps can offer additional features:
- TechSmith Capture: Ideal for professional recordings with annotations.
- DU Recorder: Provides live streaming options along with screen recording.
- ScreenFlow: Great for advanced editing and presentations.
Frequently Asked Questions
1. Does screen recording affect my iPhone’s performance?
Screen recording can consume system resources, particularly on older devices. Close unnecessary apps to optimize performance.
2. Can I record video calls?
Yes, but some platforms notify participants when a recording is in progress. Always get consent before recording video calls.
3. Can I record in high resolution?
Screen recordings are captured at your device’s native resolution, ensuring high-quality visuals.
4. How do I share my recordings?
You can share screen recordings directly from the Photos app via email, messaging apps, or social media platforms.
Conclusion
Screen recording on an iPhone is an essential feature for both personal and professional use. Whether you’re creating engaging tutorials, preserving memories, or troubleshooting technical issues, the built-in screen recording tool has you covered. With easy setup, intuitive controls, and built-in editing tools, this feature is accessible for everyone. By following the steps in this guide, you’ll be able to harness the full potential of screen recording and create content with ease.